Azure Virtual Desktop (AVD)
 The SOM Office of Information Services provides remote access to resources using Azure Virtual Desktop (AVD).
Connecting to AVD is similar to sitting down at a SOM workstation right on campus - from anywhere! You'll have access to all of the Office 365 Services (Outlook, Teams, OneDrive, etc), SOMFiles data (mapped drives such as V: and W:), and access to other UMMS/SOM/FPI resources, such as EPIC and the UMMS Store.
AVD is available for both Windows and Mac users. Because the process is cloud-based, the experience is identical for all users.
! AVD access is offered to all SOM IS-supported faculty, staff and students. We also offer Remote Desktop (RDP), which allows you to connect directly to your work computer from home. You must have a valid reason to connect to your specific computer as opposed to the AVD. To seek approval for RDP, please email the SOM IS HelpDesk at help@som.umaryland.edu. Several clinical departments also manage their own AVD environments that are specifically tailored to their departments' needs. If you belong to a department with its own IT support group [see list here], ask about availability.
In this article [jump to a section]:
How to connect to Azure Virtual Desktop
This is valid for both Windows and MacOS.
The direct link for Windows App is:
https://windows.cloud.microsoft
However, the walkthrough will begin with how to get to this link.
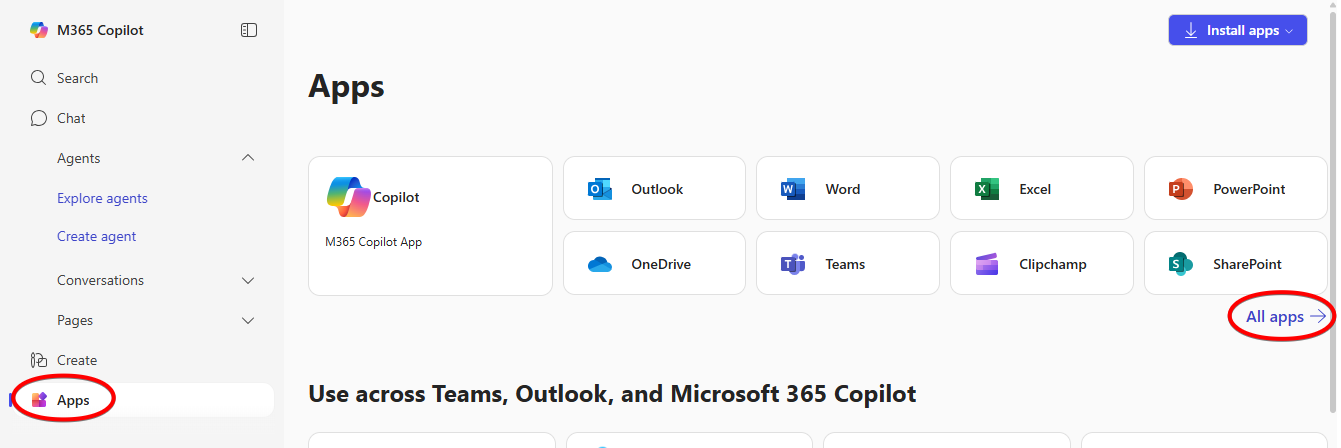
Go to https://office.com
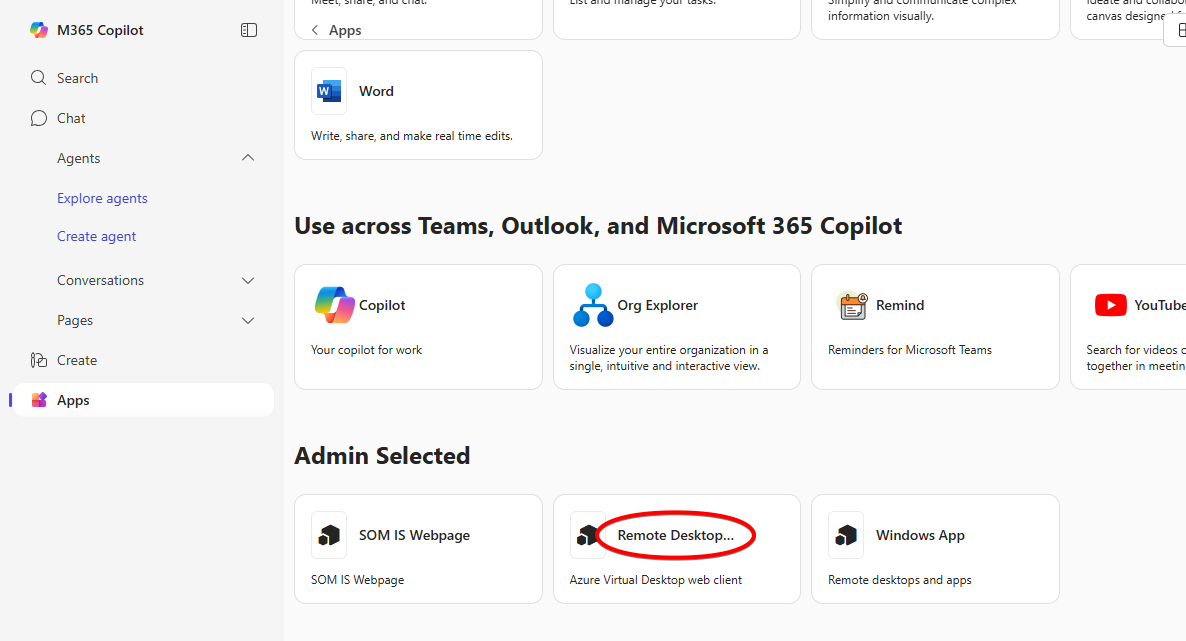
Click on Apps on the left, and then All apps on the right.
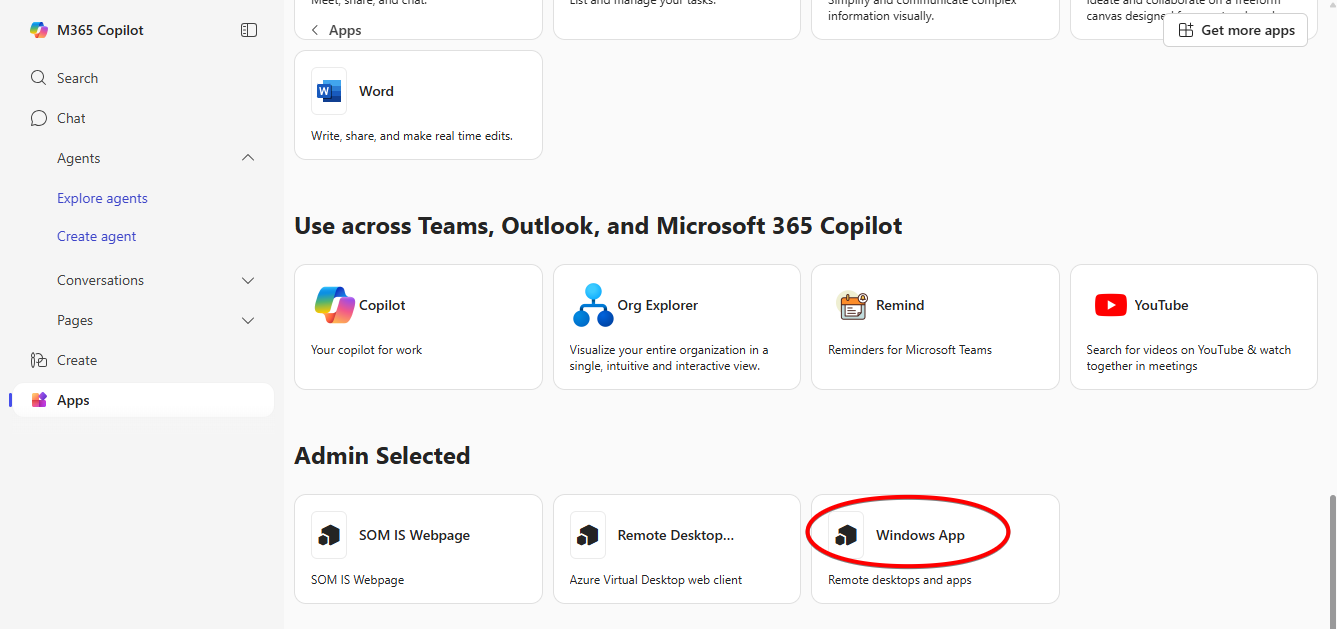
Scroll down, and click Windows App.
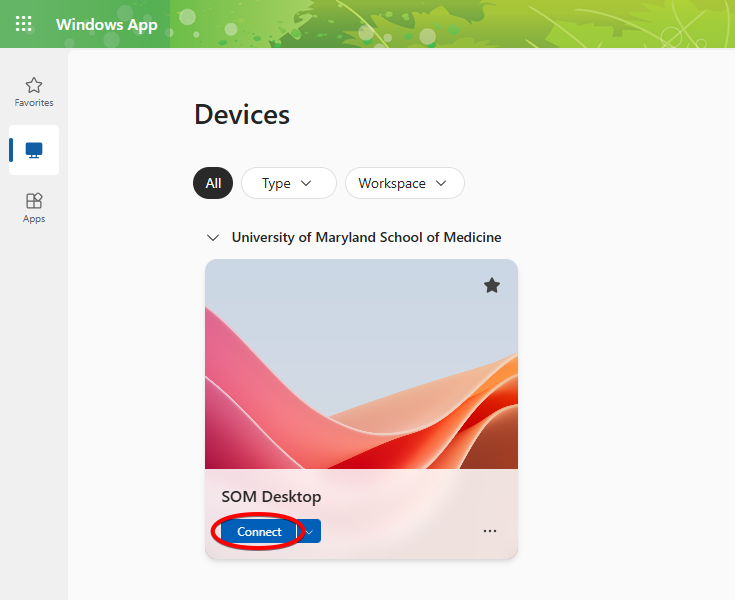
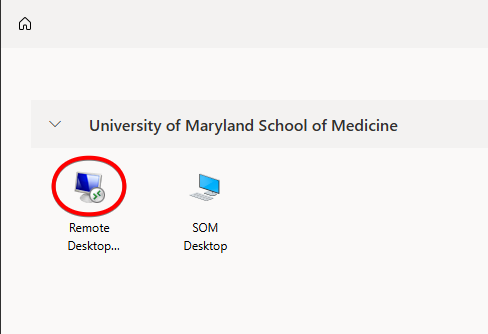
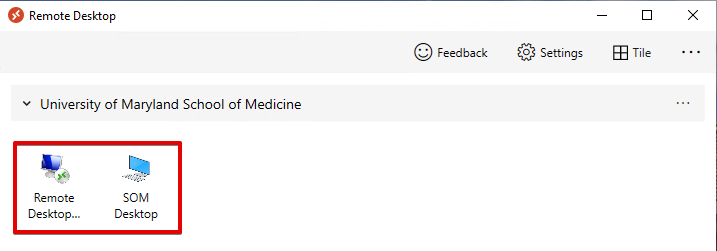
You should see the SOM Desktop, or any other Azure Virtual Desktops that you have access to listed here. Click Connect.
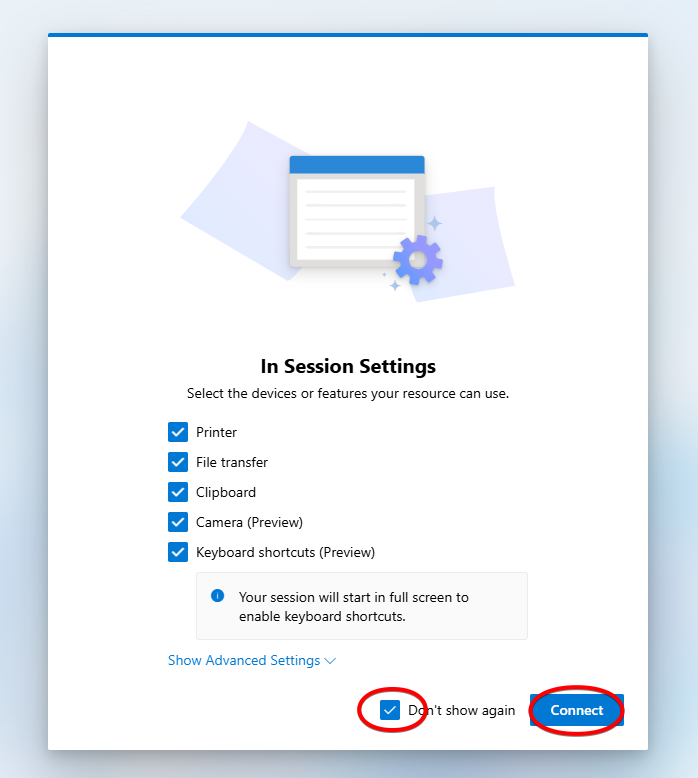
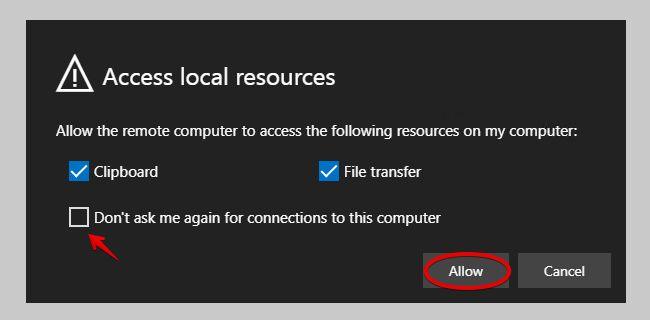
The first time you connect, you'll see a list of options. These will allow your virtual desktop to access resources on your local computer. When Printer is checked, for example, you’ll be able to print a document within your virtual desktop to a printer that is connected to your local computer. Clipboard refers to copying/pasting text or images. File Transfer allows you to copy files from your local computer to your virtual desktop. You can check Don’t show again to remember these settings. Connect when you're ready.
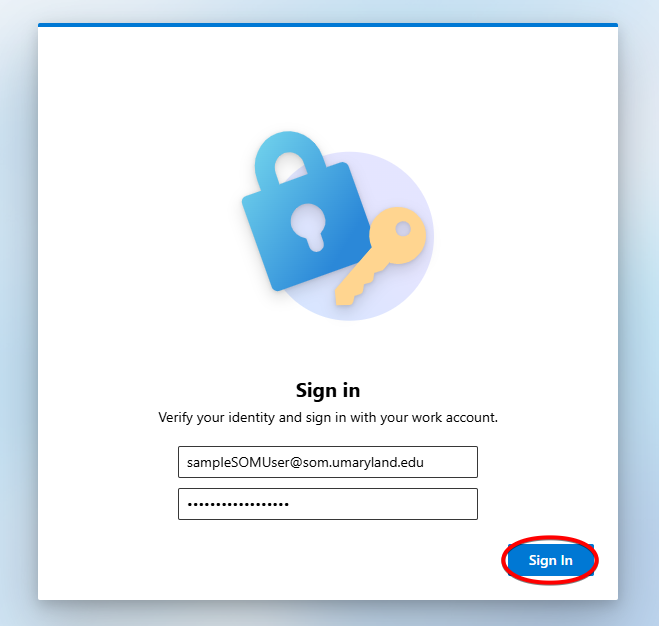
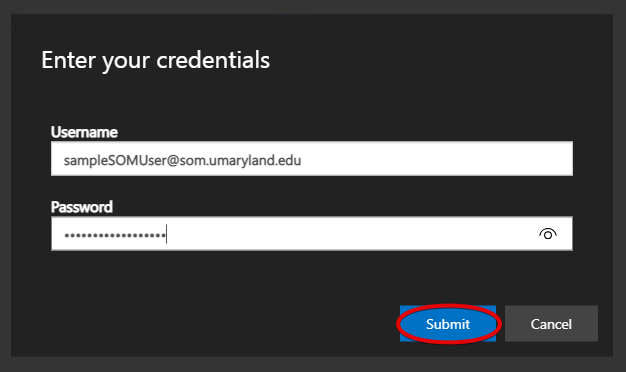
Enter your SOM credentials, click Sign In, and if prompted, authenticate with DUO.
Here’s your virtual desktop. This is just like sitting down in front of a SOM workstation on campus. It will have Office 365, including Outlook and OneDrive, your usual mapped drives to SOMFiles, and other commonly used programs such as Epic and the UMMS Store. The entire thing operates inside a web browser window, however it opens in full screen mode so it won't look like it.
While working in a virtual desktop, you should save your files to either a network /mapped drive (H:, V:, etc) or to your OneDrive.
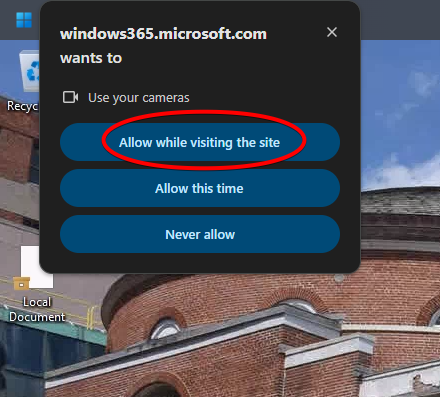
The first time you connect, you'll be prompted to allow access to your local computer's camera and microphone. This is important if you want to use Teams for meetings. Click Allow while visiting the site.
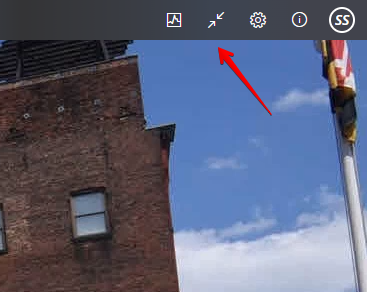
To exit full screen mode, click the two arrows in the upper right hand corner. You'll be able to access both the AVD and your local computer.
When you're done, sign out like you would a regular computer.
How to connect to Remote Desktop
This is valid for both Windows and MacOS.
The direct link for Remote Desktop is:
https://windows365.microsoft.com/ent#/apps
However, the walkthrough will begin with how to get to this link.
Go to https://office.com
Click on Apps on the left, and then All apps on the right.
Scroll down and click Remote Desktop.
Now you should see an icon for a Remote Desktop. Click on this.
These options will allow your virtual desktop to access resources on your local computer. Clipboard refers to copying/pasting text or images. File Transfer allows you to copy files from your local computer to your virtual desktop. You can check Don’t ask me again to remember these settings.
Enter your SOM credentials and authenticate with DUO.
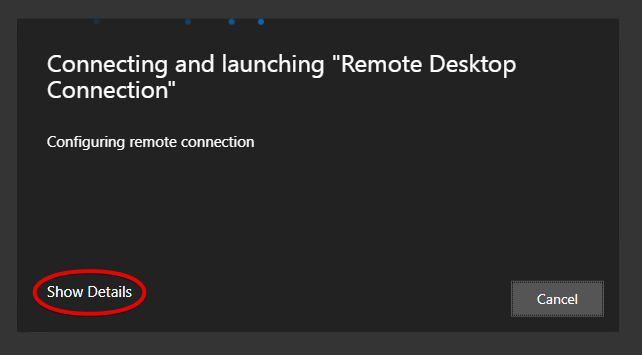
If you do not have DUO set to automatically push to your mobile app, you may have to click Show Details to display the DUO authentication options.
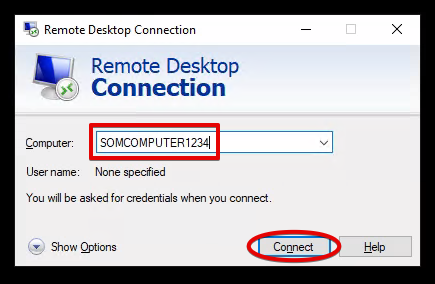
Next, the Remote Desktop Connection window will open. You'll type the name of your computer here. This will be given to you by the SOM IS Helpdesk during the approval process. Click Connect.
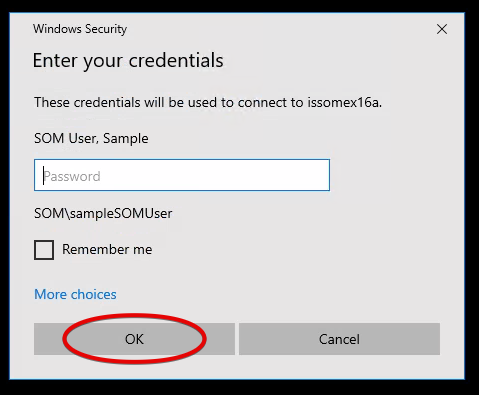
You'll be asked to authenticate once again.
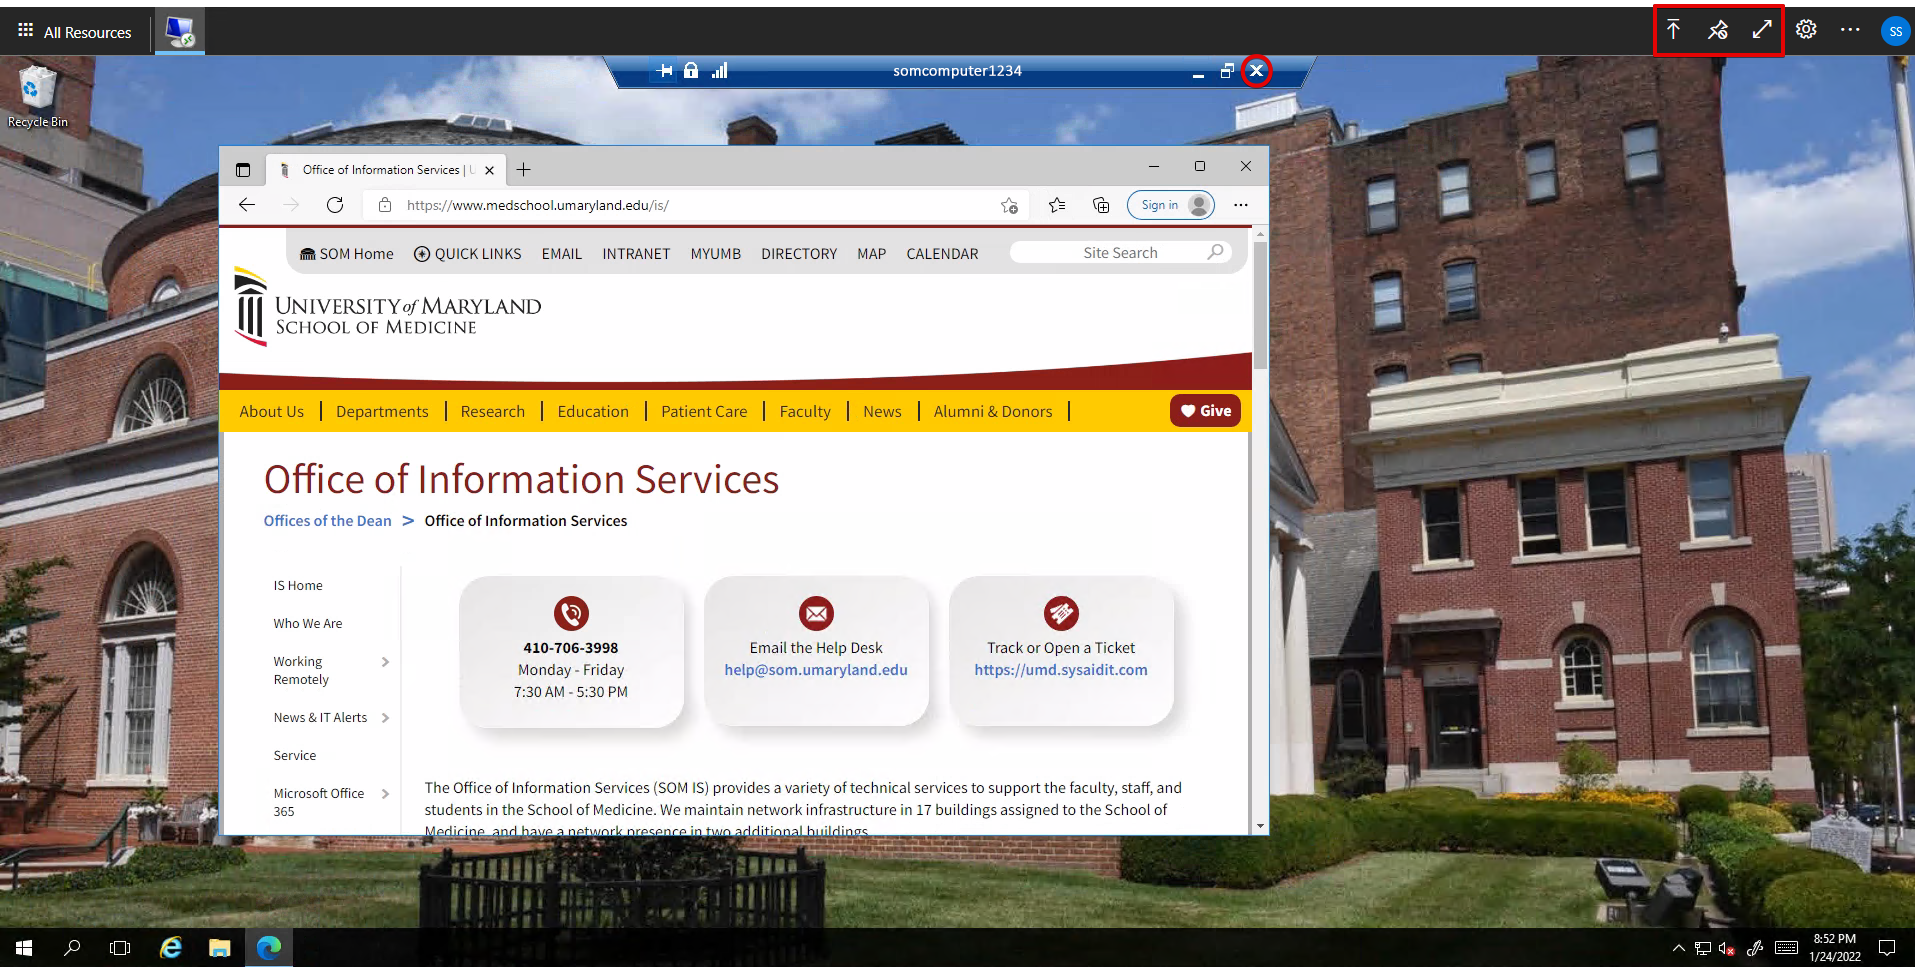
Finally, you should be connected to your work computer. It should look and feel exactly as if you were in on campus, except the entire thing is displayed inside a web browser window. To close it, simply click the X at the top, or go to the Start button > Power > Disconnect.
In the upper right hand corner, you have three icons. The up arrow will allow you to copy a file from your local computer to the virtual desktop. The double arrow will display the virtual desktop in full screen mode.
The pushpin icon will hide the black bar and replace it with a pull down tab at the top of the screen:

Click this to bring back the RDP controls.
How to install AVD Client (Optional)
As an alternative to using a web browser to access AVD or RDP, you can install an application. In some cases, it can provide a better experience. This will work for Windows users only.
Download the client here:
https://go.microsoft.com/fwlink/?linkid=2068602
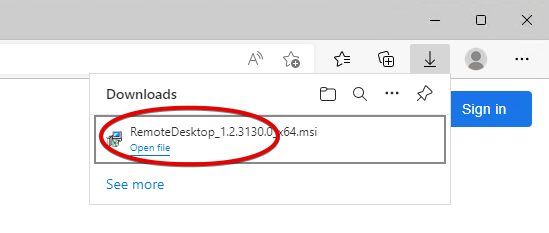
Open the file once it's downloaded.
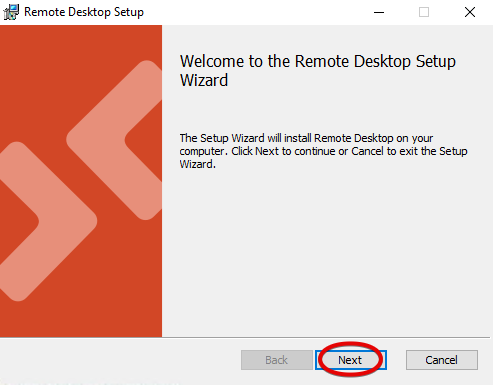
Click Next.
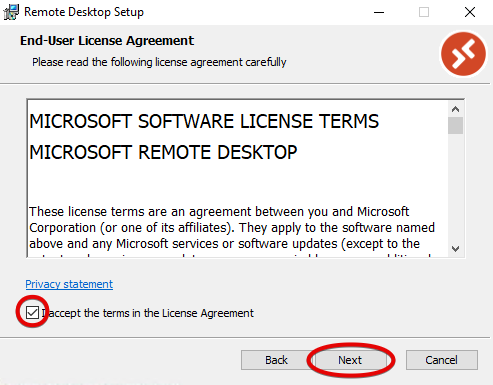
Check the box to accept the terms and click Next.
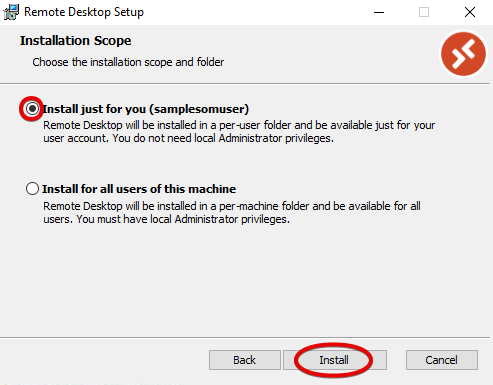
Choose Install just for you and click Install.
Click Finish.
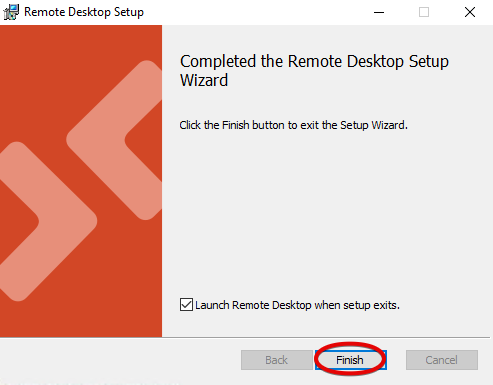
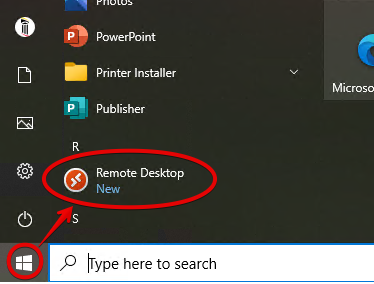
The app should open automatically. If can be opened manually at any time.
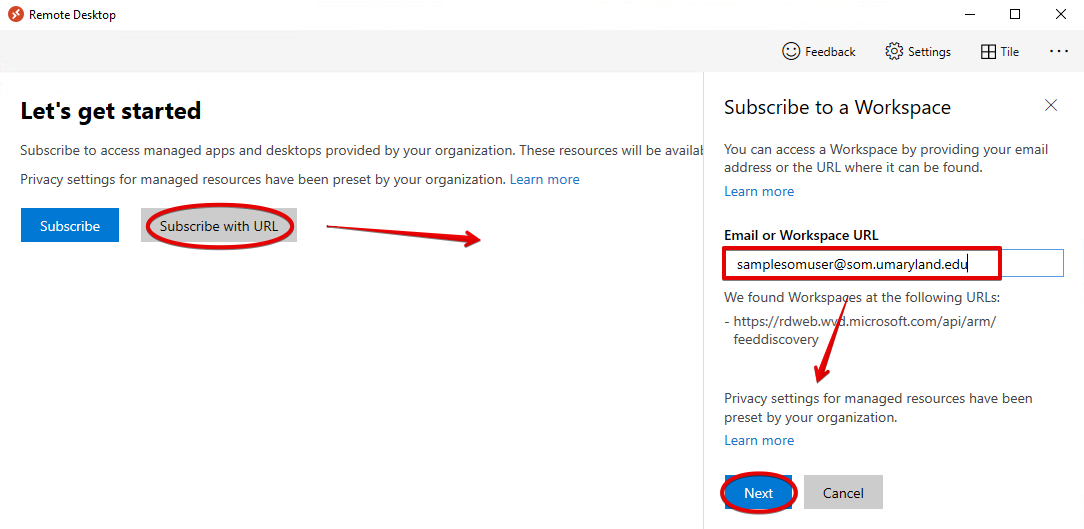
Now that it is open, click Subscribe with URL. Enter in your email address in the box supplied, and then click Next.
You should now see any services you have access to. Double click one to open.
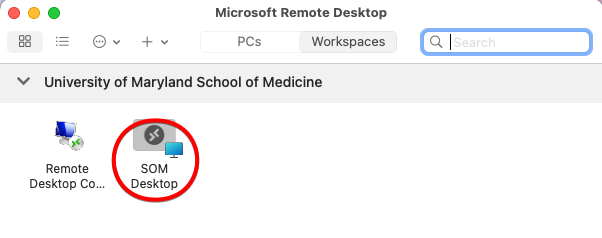
How to install Azure Virtual Desktop Client for macOS (Optional)
As an alternative to using a web browser to access AVD or RDP, you can install an application. In some cases, it can provide a better experience. This will work for macOS devices that are enrolled in Jamf. If you are using a campus-owned macOS device and you are not enrolled in Jamf, please do so.
If you are using a personal macOS device, please use the web version.
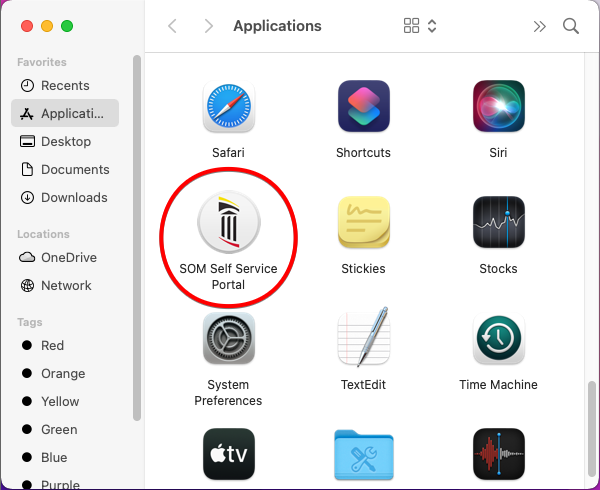
Go to the Self Service Portal.
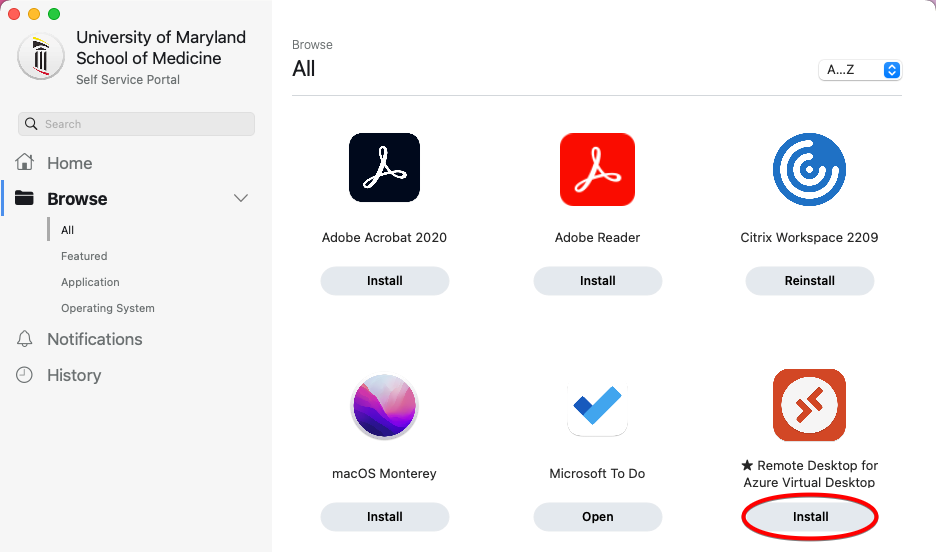
Install the Remote Desktop for Azure Virtual Desktop.
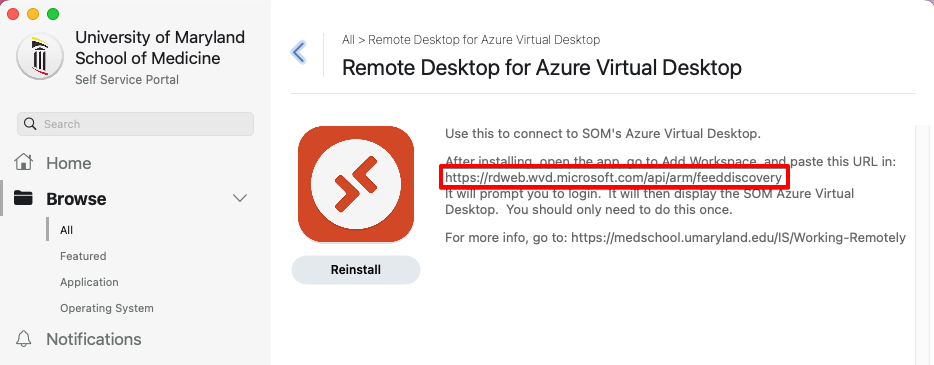
You'll see installation instructions appear, along with another Install button. Install the app, and copy this URL.
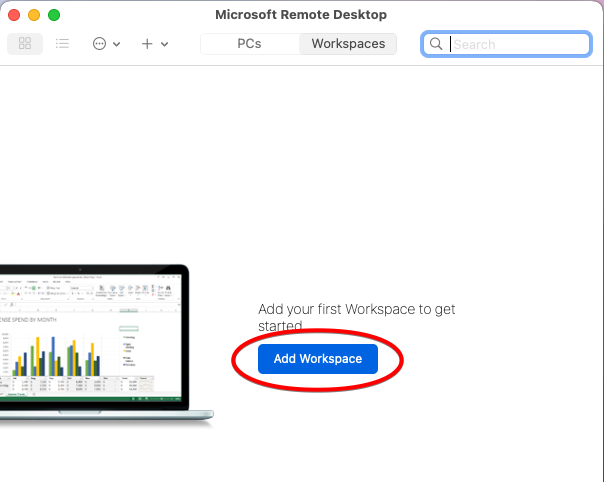
Open the app.
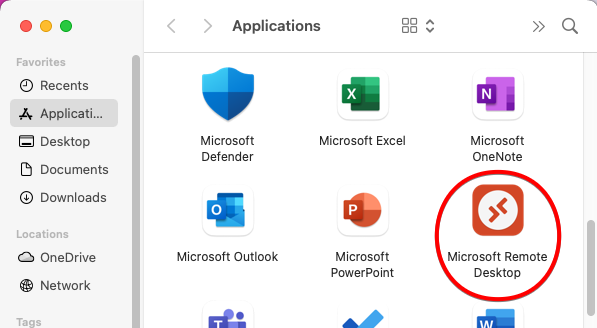
Click Add Workspace.
Paste in the URL you copied a few steps before. Now click Add.
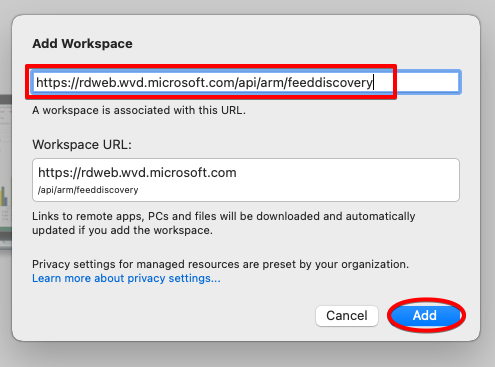
You'll be prompted to sign in with your SOM credentials. You can now connect to SOM's AVD through this app!